ChromeOS Flex
To play your Playr channel automatically on a mini-PC, you want the device to start automatically in full-screen mode when you turn it on. One way to accomplish this is to install ChromeOS Flex and run our kiosk app, like the Playr app for ChromeOS. Even though our app is free, Google requires you to buy a Chrome kiosk license to install a kiosk app. Requiring this license is, unfortunately, the new policy by Google as of ChromeOS version 70. A license costs $53/year per device. The upside is that it enables you to remotely manage the device from your Google Chrome dashboard.
Buy Your Own License
You can buy a license from Google yourself. Unfortunately, not directly: you need to find a Google partner that will sell you a license. Once you have your license, you need to set up your Google Chrome environment as described in the ChromeOS Via Chrome Device Management.
Buy A License Via Playr
The previous process can be quite tedious and complicated. That is why we also offer the option to buy a license through us. With this you get your own login to manage your devices within the Playr Chrome environment. There is no surcharge; you pay the €45/year ($53/year in USD) per device that Google charges.
This is the process:
- Mail us a request for one or more Chrome licenses with the date when you need them.
- We order the licenses from our Google partner (which might take up to 3 workdays).
- As soon as we receive the licenses, you will get a login for the Playr Chrome domain with which you can login to your ChromeOS device, as described in the procedure below.
- Mail us when you have enrolled your ChromeOS device so that we can make it available for you in the Playr Chrome environment from where you can manage the device remotely.
Creating The ChromeOS Flex Install Medium
To use ChromeOS Flex (a version of Google ChromeOS that runs on any PC) you must install it on the device you want to use. For this, you need to create a USB thumb drive containing installer software that you then use to install ChromeOS on your device (mini-PC). Make sure you have a USB thumb drive of at least 8GB size. To make the USB thumb drive follow these steps:
- On Windows or MacOS install the Google Chrome extension "Chromebook Recovery Utility" by starting Google Chrome and going to this page, click the Add to Chrome button and then the Add extension button.
- Put the USB thumb drive in your PC/laptop
- Start the tool by clicking the puzzle piece icon left of the URL-bar in Google Chrome and then clicking the Chromebook recovery tool item.
- In this tool:
- Click the Get started button
- Click the Select a model from a list link
- In the Select a manufacturer list select Google ChromeOS Flex
- In the Select a product list select ChromeOS Flex
- Click the Continue button
- Select the USB thumb drive
- Click the Continue button
- Click the Create now button
After the Chromebook Recovery Utility has finished writing to the USB thumb drive, you can quit the utility and remove the USB thumb drive. The USB thumb drive is now ready to be used in your mini-PC.
Installing ChromeOS Flex
Connect your device (mini-PC) to a keyboard, mouse (or something similar, like a keyboard with an integrated touchpad), monitor (or TV), and insert the USB thumb drive. Now connect the device to power and turn it on. The screen should now show you the initial ChromeOS Flex install screen (if that is not the case, you probably need to turn off the device and turn it back on while holding down a key that will give you boot options which will allow you to make sure the device boots from the USB thumb drive, this key is different for different manufacturers but there usually is a text during the boot process that indicates which key to press).
From this screen follow these steps:
- Click the Get started button
- Click on the Install ChromeOS Flex area; a checkmark will appear
- Click on the Next button
- Click on the Install ChromeOS Flex button
- On the popup, click the Install button
- The next screen will say Installing ChromeOS Flex
- When the installation is complete, a screen will appear asking you to remove the USB thumb drive and that the device will reboot in 60 seconds
The device is now ready for the final step; enrolling the device using the information you received when you bought the Google ChromeOS license.
Enrolling The Device
If the device has been logged onto even once, you will need to wipe (reset) it first before proceeding. The installation procedure below will not work otherwise.
- Connect a keyboard and mouse (or something similar, like a keyboard with an integrated touchpad) and monitor (or TV) to the device and turn it on.
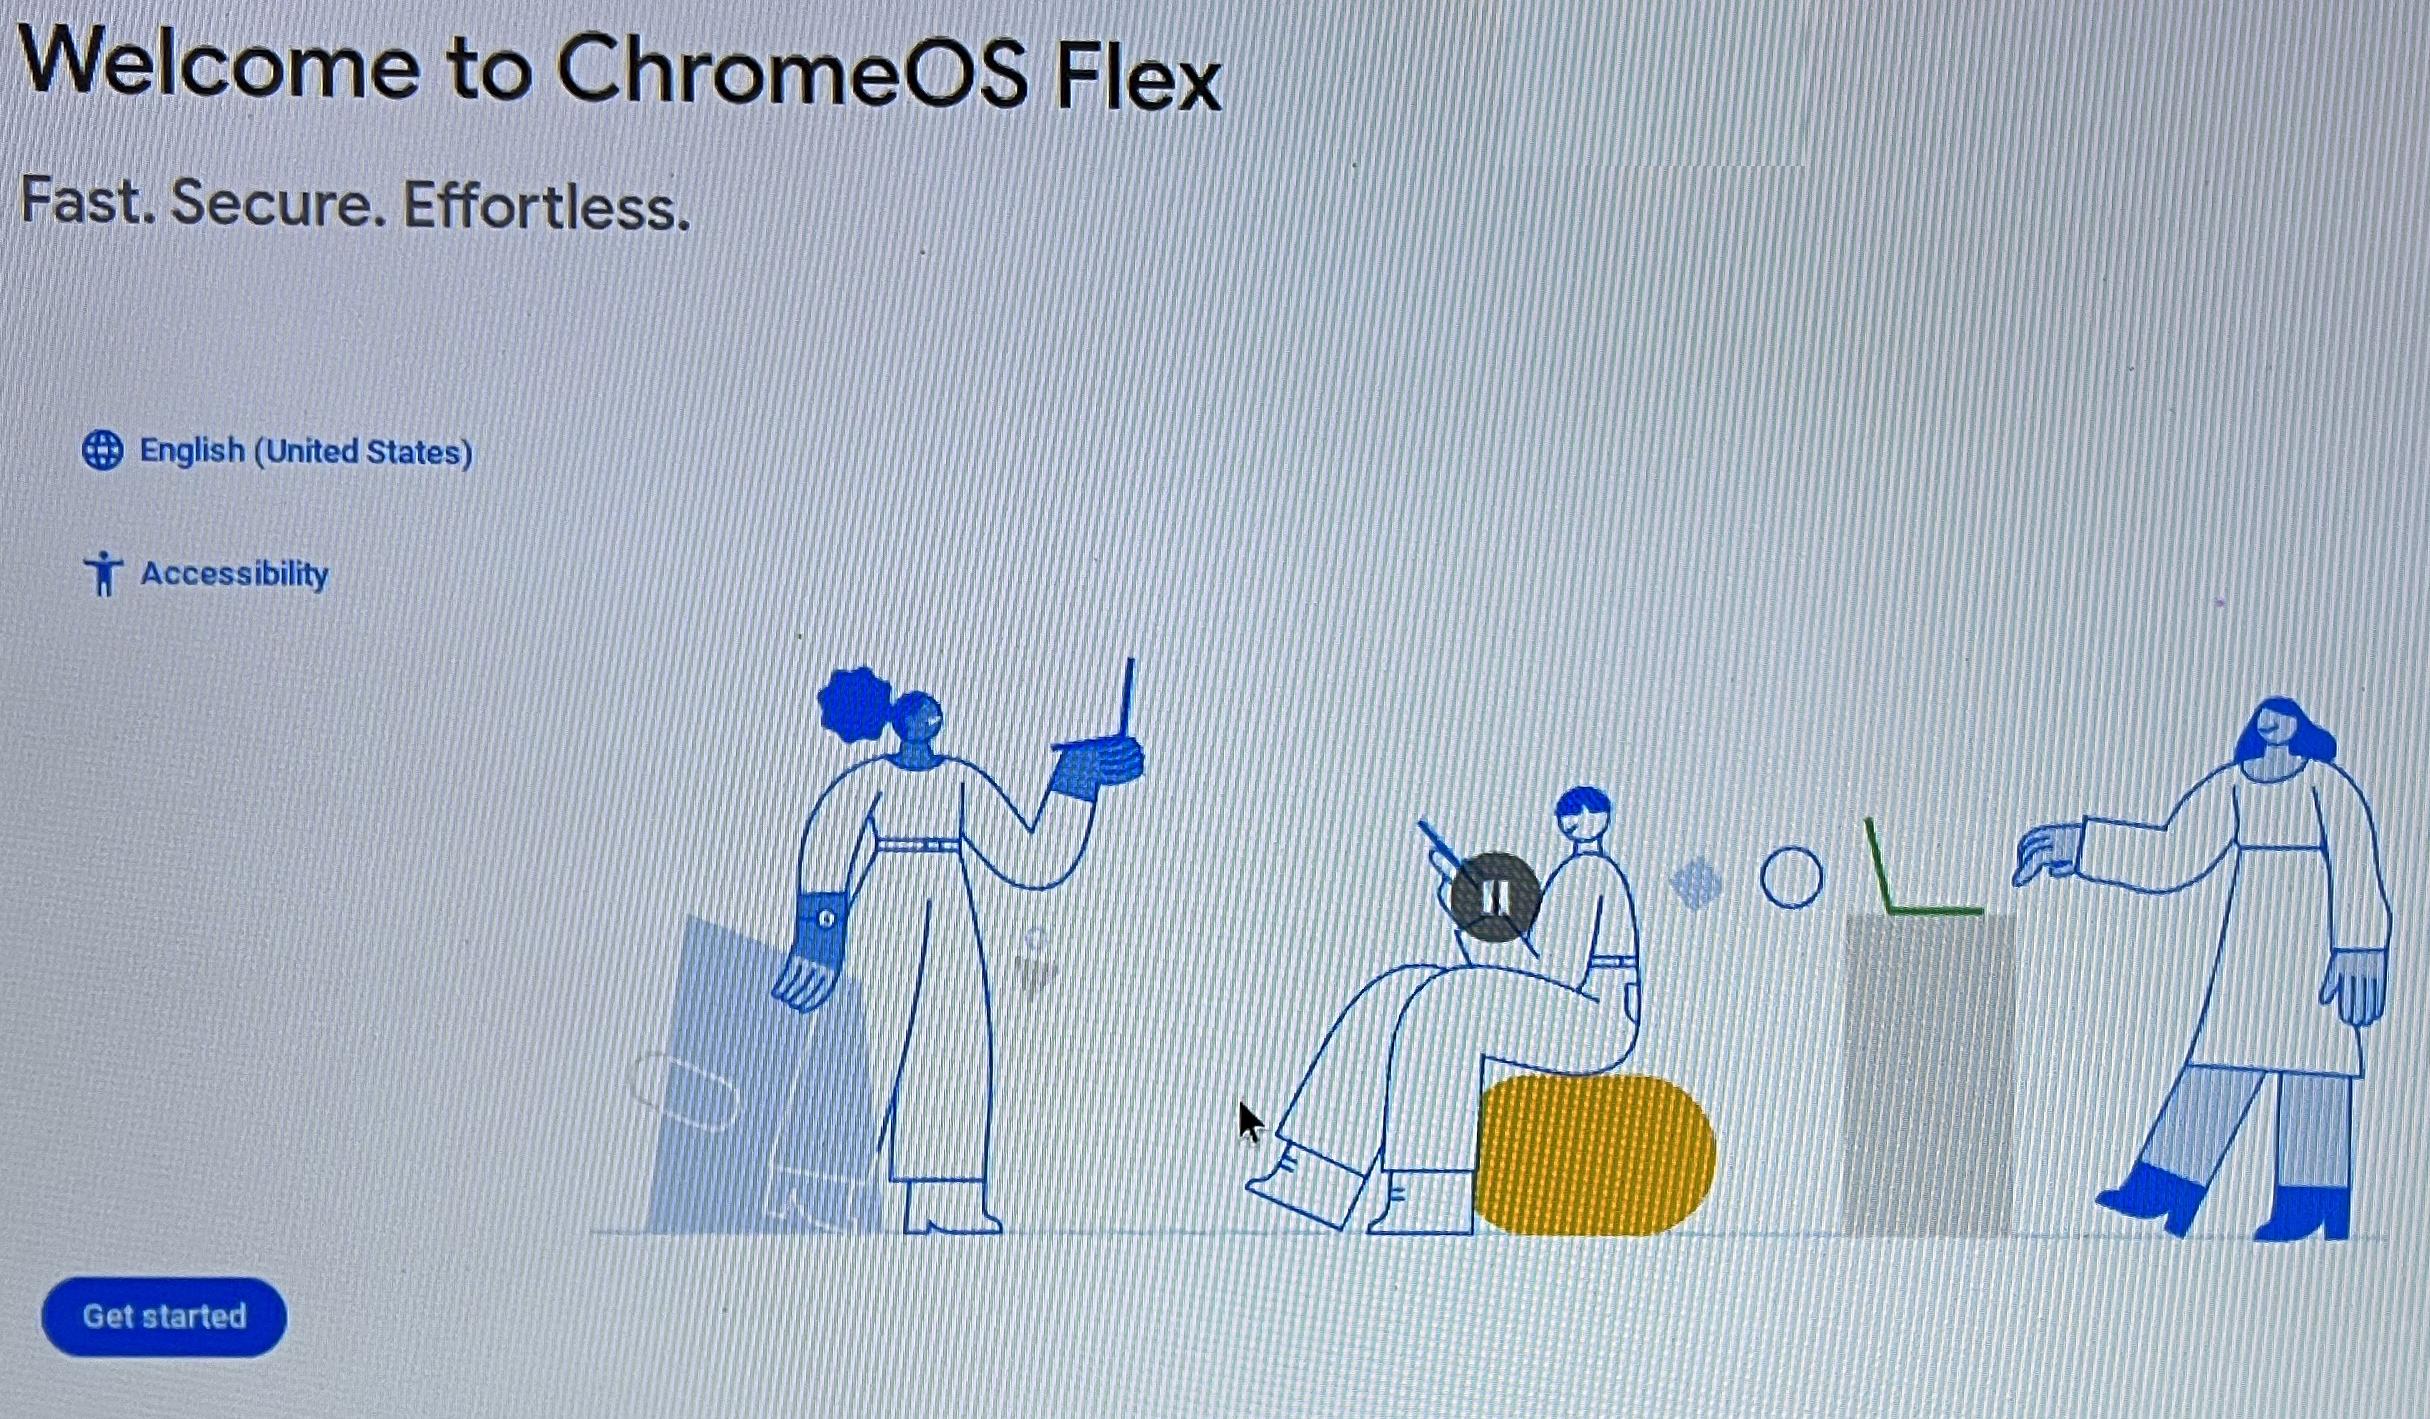
- On the welcome screen, change the language by clicking on the English (United States) if necessary, you can set Accessibility options by clicking on the Accessibility link
- Click the Get started button
- Under your Chromebox setup, select For work.
- Then choose to enroll the device
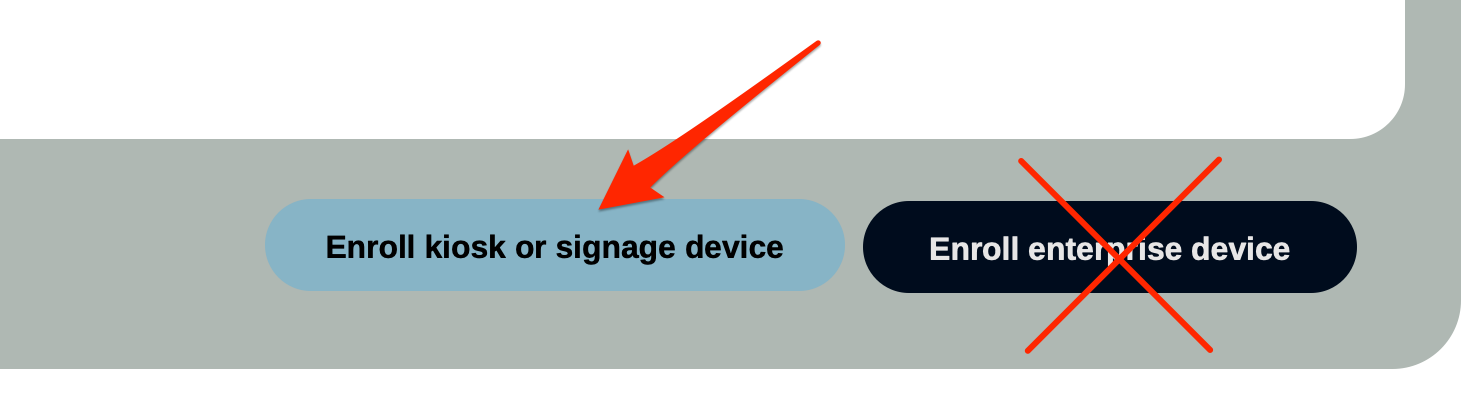
- Enter the e-mail address of the user account associated with your Google license and click Next
- Enter the password of the user account and click Enroll kiosk or signage device.
- The device will now check for updates, install the required kiosk app and configure everything as defined in the Google device management dashboard, making it ready for playback.
- The device will start playback automatically and start the registration code. Follow the steps to register your player to finish the Playr setup.
Currenlty the Chrome browser by default does not allow access to resources on the local network (LAN). So if you want to use sources/servers on your LAN with our apps these sources need to be white listed. Please contact us, if you bought a ChromeOS license via us, with a list of URLs of the sources you want to use and we will configure your players so this is possible. If you bought your own license read the ChromeOS Via Chrome Device Management page.
We recommend using a wired network connection, whenever possible.
Changing Device Settings Afterwards
Since nearly all settings of a specific ChromeOS Flex device can be set from the Device Management dashboard, it is very unlikely that settings need to be changed on the device itself. Should that be necessary it is still possible to do that, do the following:
- Turn off the ChromeOS Flex device.
- Connect a keyboard and mouse.
- Turn the device back on.
- On the white startup screen it will say Press Ctrl + Alt + S to leave kiosk mode; do this by pressing the Ctrl + Alt + S keys simultaneously. You will now see the normal login screen.
- Change any of the settings as needed.
- Restart the ChromeOS FLex device.
Advanced; Best BIOS Power Settings
Most (mini-)PCs have the ability to restart when there is an interruption in the power supply. This is not only a useful feature when there is a power outage but more importantly, it enables you to use a clock switch to turn your (mini-)PC (player) off and on. Certainly, if the connected TV screen or monitor automatically switches to the HDMI port when the power is turned on this allows for a reliable, low-tech way to schedule your TV and player to turn on and off saving energy and the environment (a clock switch combined with a power strip).
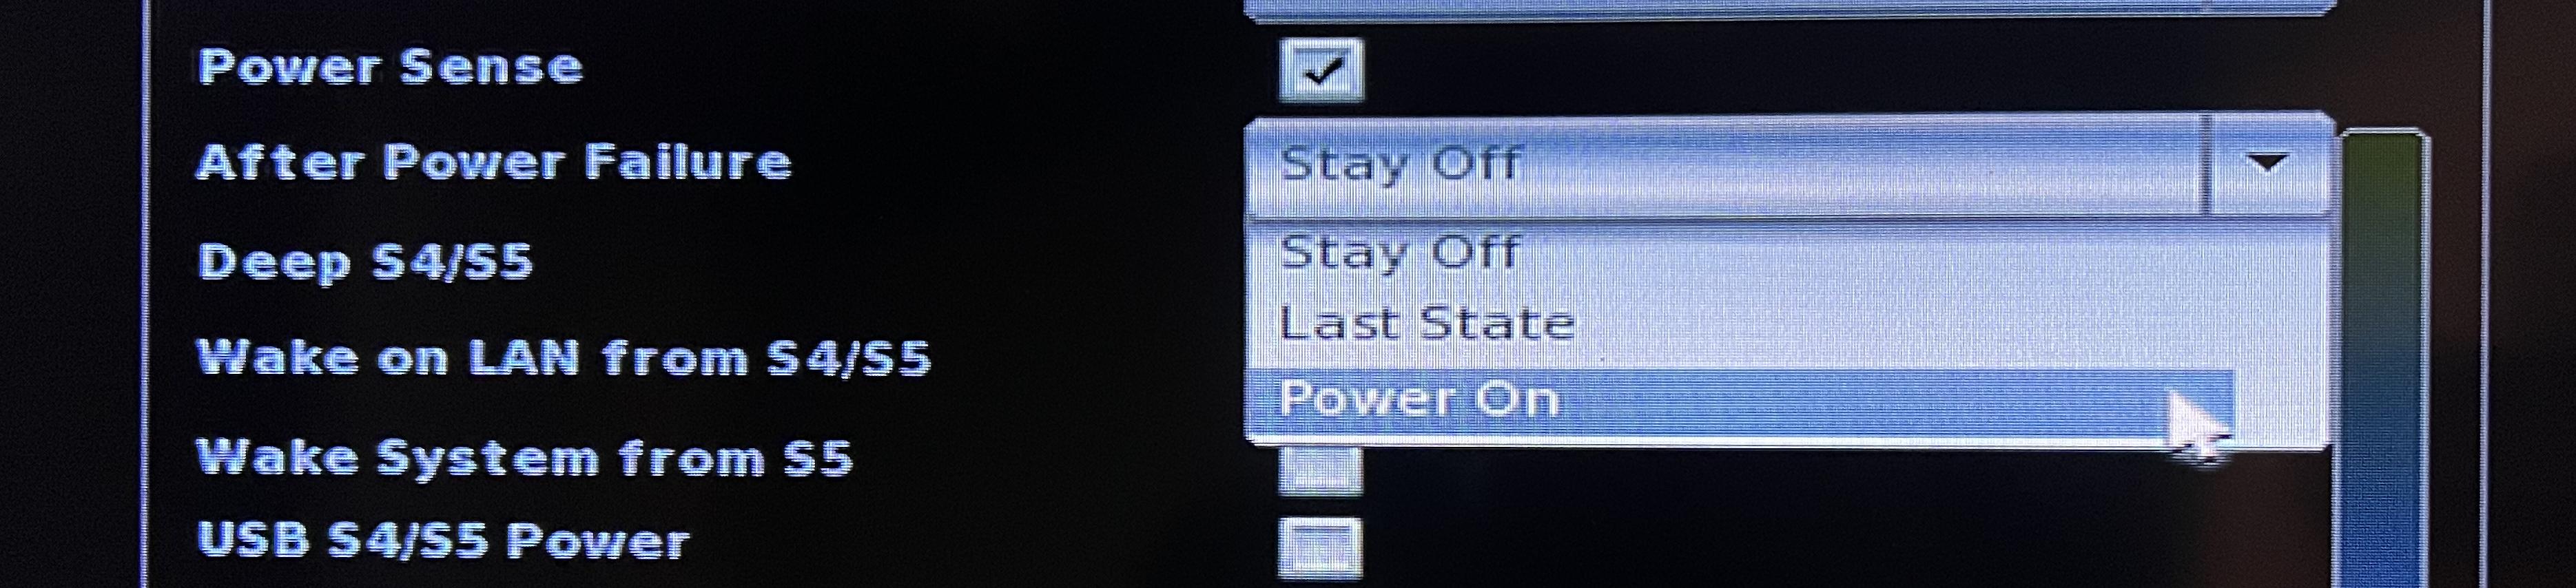
To ensure that your (mini-)PC automatically switches on after an interruption in the power supply check the power settings in the BIOS of the device for a setting named "power failure" or something similar. Below is an image of the BIOS of an Asus NUC as an example. This setting should be set to either
- Last state in which case it will turn back on if the device was running at the time of the power interruption or,
- more aggressively, to Power on to make sure the device is always turned on when it has power.
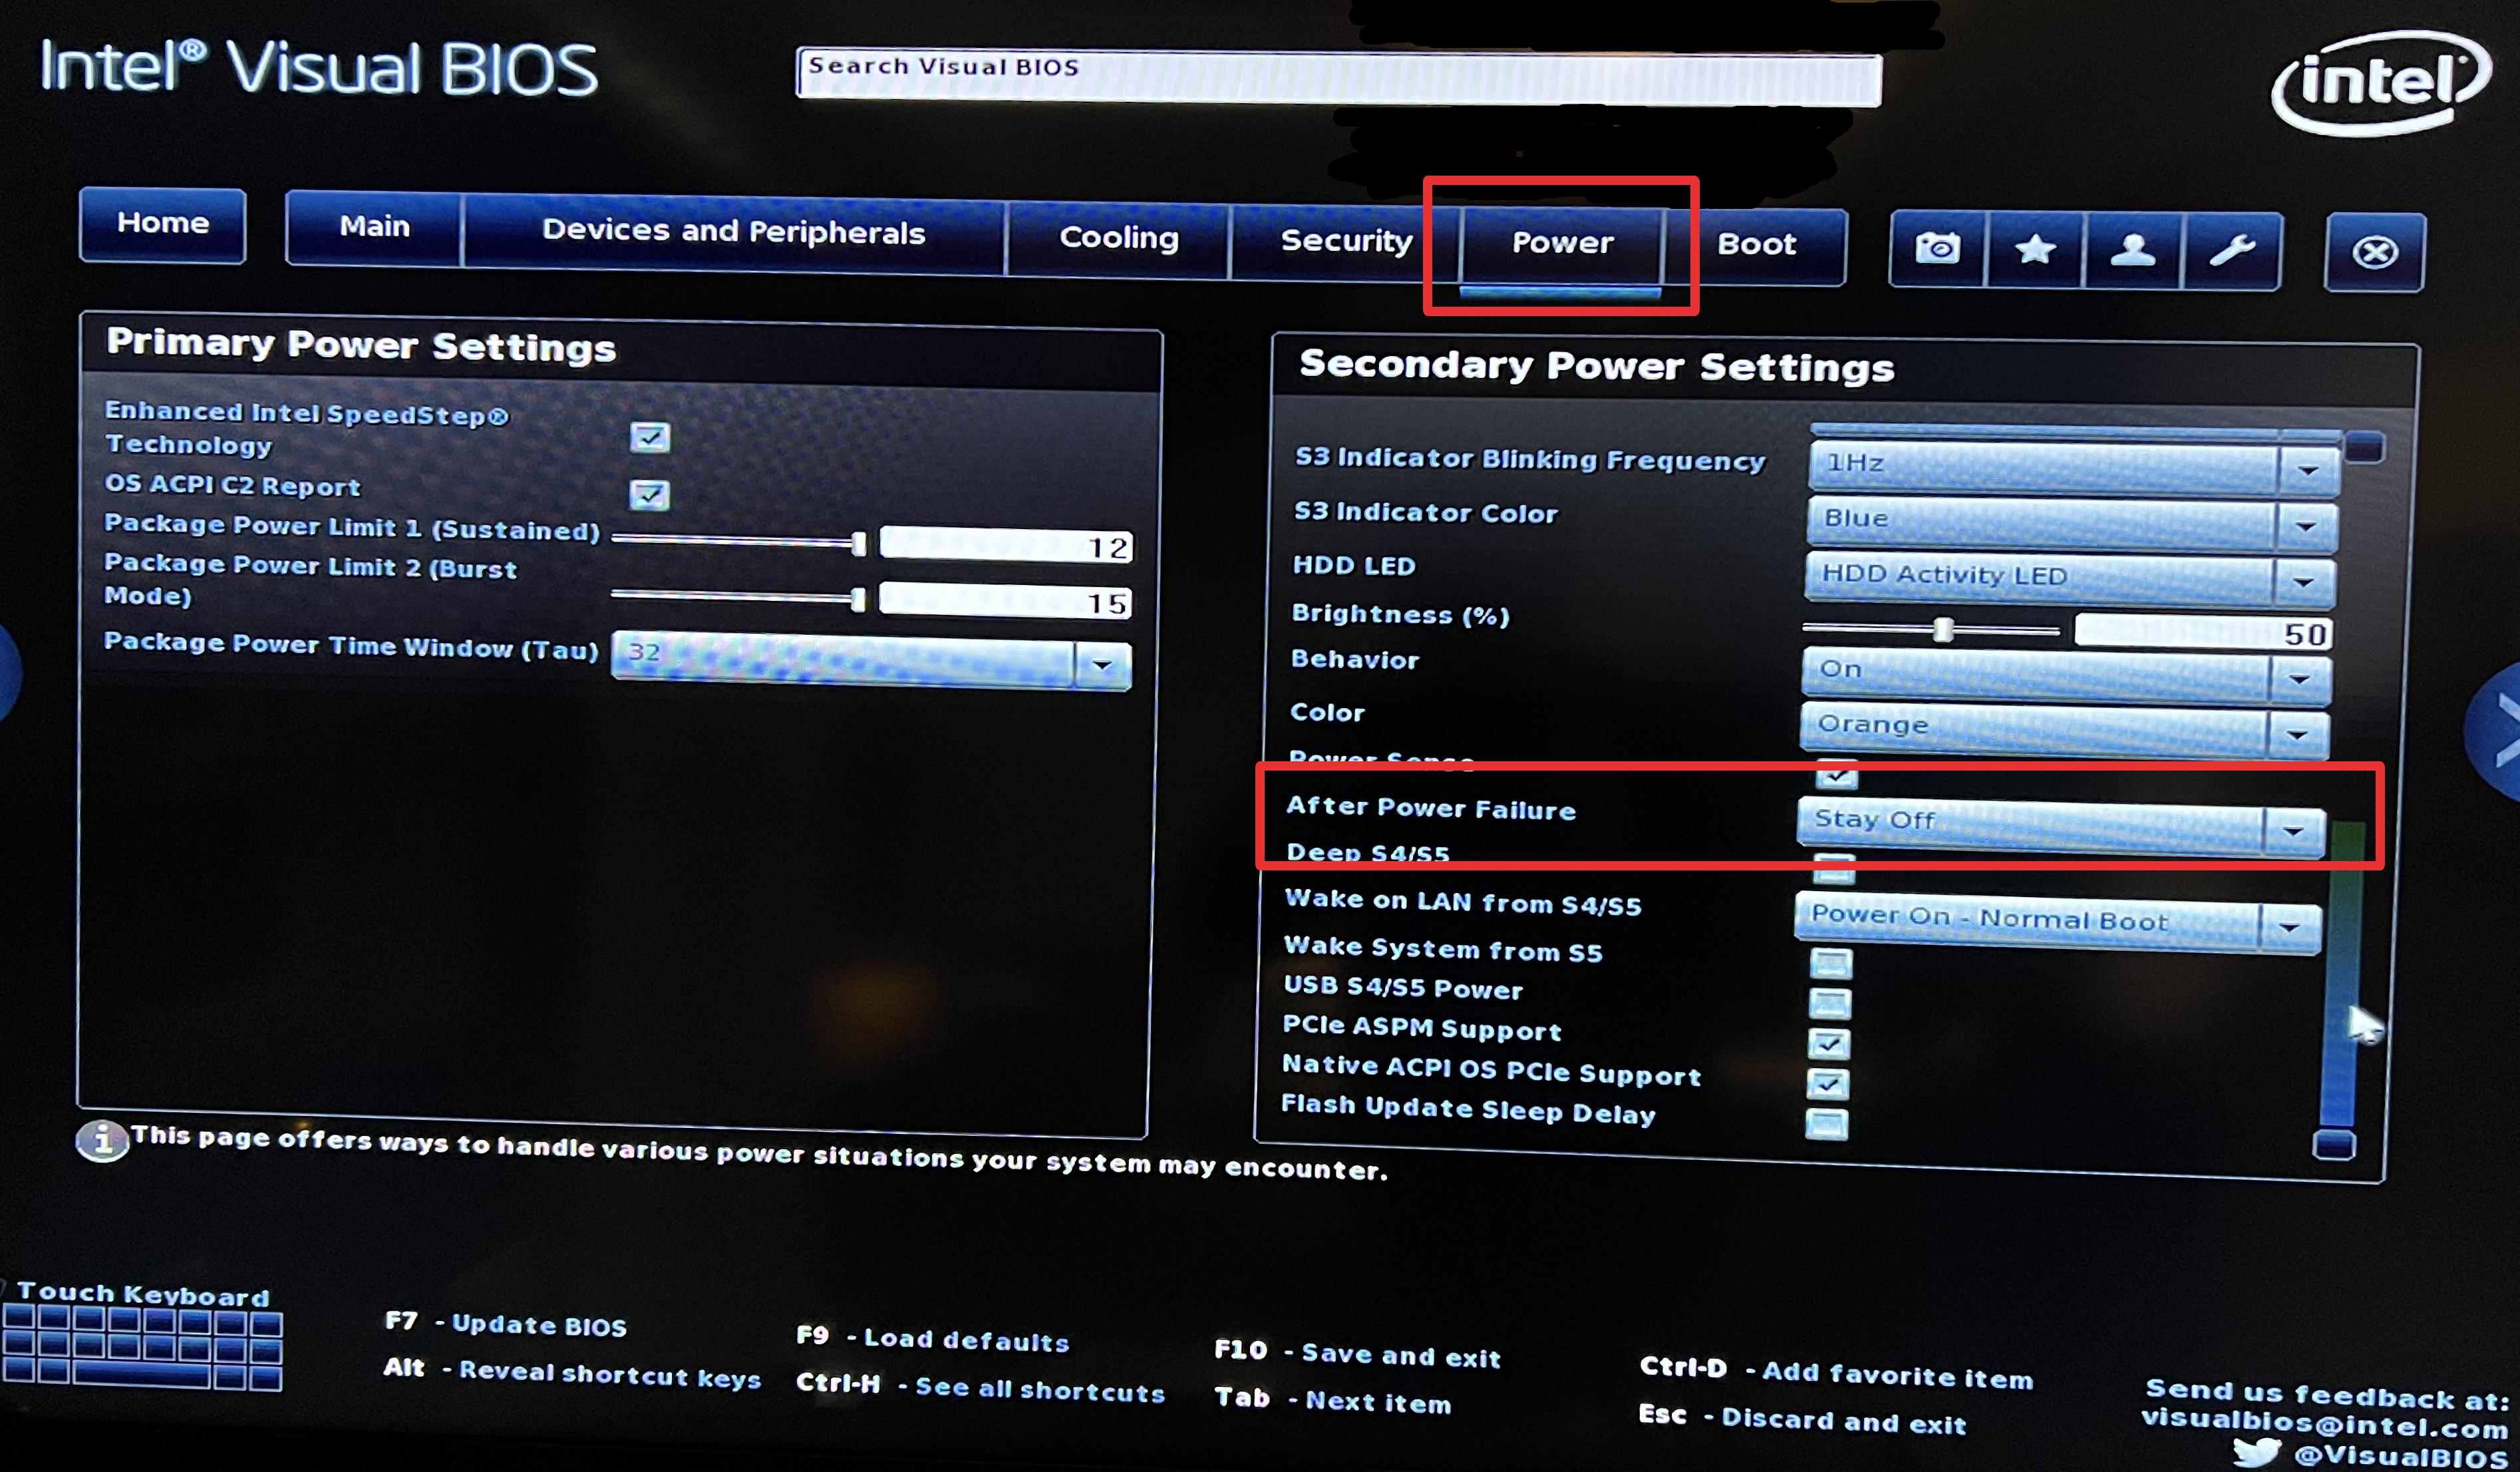
Options for power failure recovery
Another useful setting can be the Wake on LAN setting that allows for turning the device on "from a distance" over the network. A precise "how to" of making use of this technology is, however, out of scope for this help page. If you need support for wake on LAN please email us.